Before moving on to adding content to your Alerts web part, there are a couple of things you need to do.
1# Add the web part to a page
Follow the instructions, depending on if you are installing the web part in Classic SharePoint or Modern SharePoint.
In Classic SharePoint
- On the page where you want to add the web part, click on Edit;
- On the toolbar click Insert, and then Web Part;
-
On the categories list, select the BindTuning Add-in and then BindTuning Alerts;

-
Now click Add.
In Modern SharePoint
ⓘ FOR SPFX-READY VERSIONS (V2.6.3.18 OR HIGHER)
-
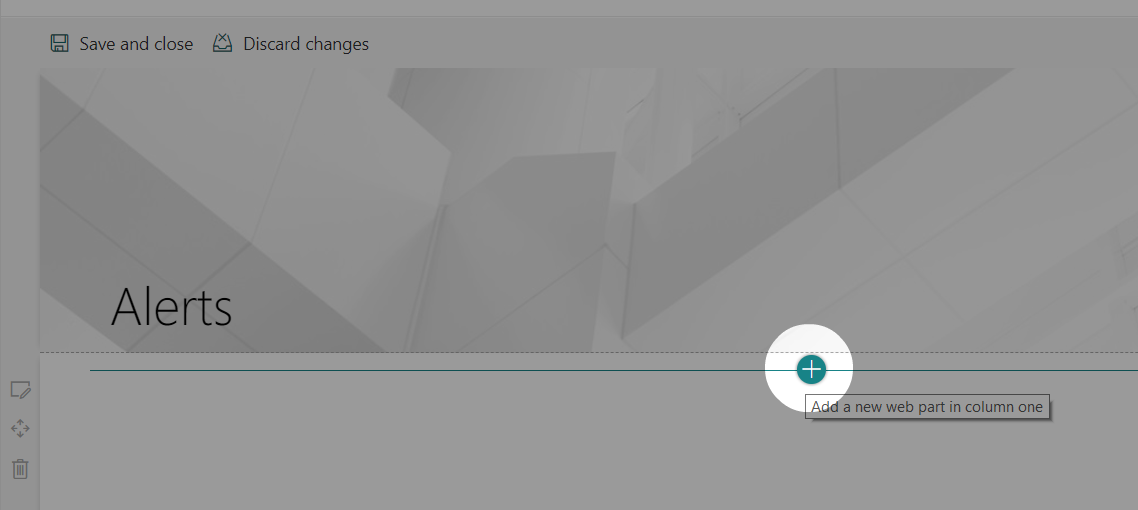
Place your modern page in Edit mode;

-
Click on the [+] button to add a new web part or section to your page;
-
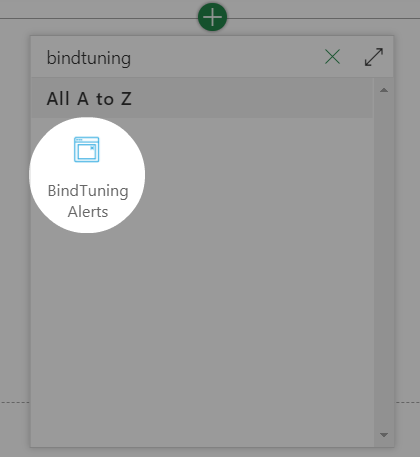
On the web part panel, search for BindTuning to filter the web parts. Click on the alerts web part;
That was easy!😊 Now the only thing left to do is to connect the web part and setup the rest of the web part properties.
2# Create a list
This list is what you will use to store your alerts. There are two ways of creating lists depending on whether you're using web parts in Classic SharePoint or Modern SharePoint.
In Clasic Sharepoint
-
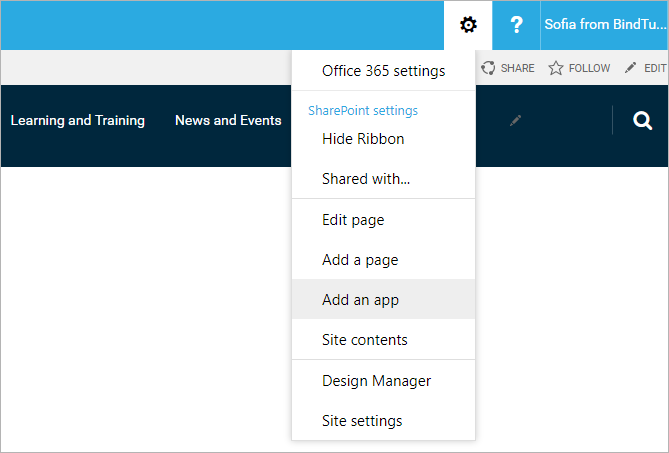
Open the settings menu and click on Add an app;
-
On the search box type Alerts;
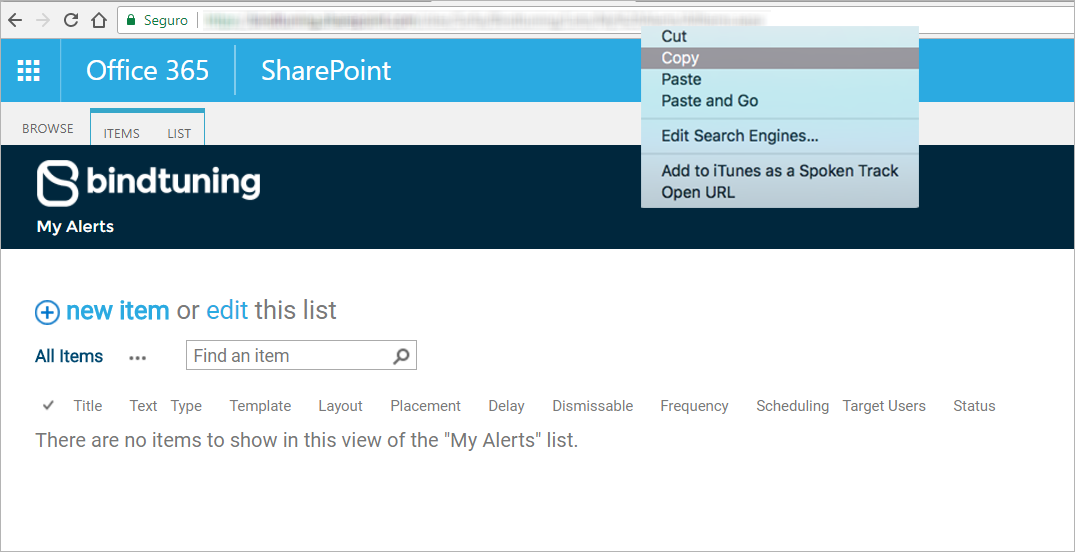
- Look for the Alerts list and open it;
-
Pick a name for the app and click on Create;

-
You've created the list that will contain all the specific fields from this web part.
-
Open the list that you have created, and copy the list URL, you will need it to connect the list and webpart.
In Modern SharePoint
ⓘ FOR SPFX-READY VERSIONS (V2.6.3.18 OR HIGHER)
-
Place your modern page in Edit mode;
-
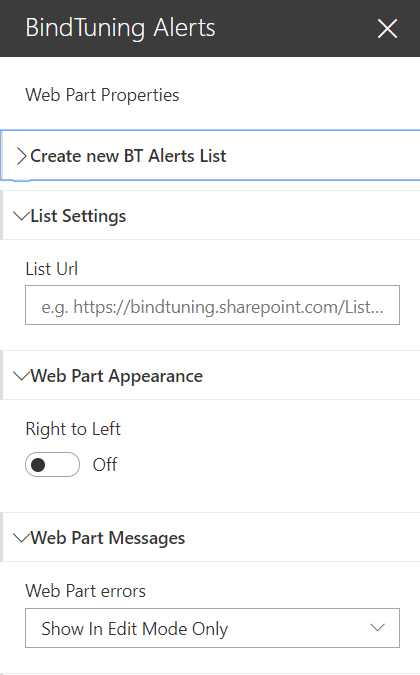
Mouse hover the web part and click on the pencil (✏️) icon that will appear;

-
Open the first tab called "Create new BT Alerts List"

-
Type the name of the list and hit "Create the List"
- If your web part wasn't linked to a list yet, it will get linked for you automatically. Otherwise, the list will simply be created on your current Site.
3# Set up the web part properties
Follow the instructions, depending on if you are installing the web part in Classic SharePoint or Modern SharePoint.
In Classic SharePoint
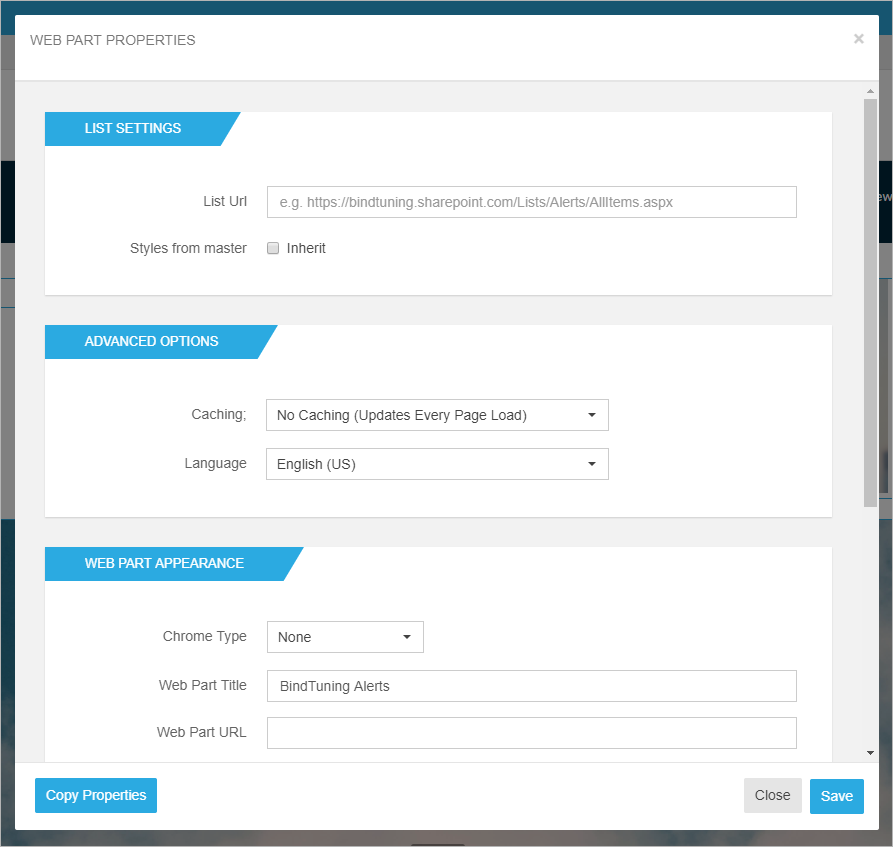
During the final step, we are going to connect the list you created (Step 1 - Create a list) with the web part and set up all the web part properties.
-
To configure the web part properties, on the ribbon click on the BINDTUNING tab and then on Edit Web Parts - the edit panel will appear from the left side of your web part;
-
Time to set up your web part properties! For more on what you need to do in each setting visit the Web Part Properties Glossary;
-
And you're done configuring your Alerts web part! Now click Save and wait for the page to refresh.
You can change the web part properties whenever you want!
In Modern SharePoint
ⓘ FOR SPFX-READY VERSIONS (V2.6.3.18 OR HIGHER)
-
Place your modern page in Edit mode;
-
Mouse hover the web part and click on the pencil (✏️) icon that will appear;
-
Time to set up your web part properties! For more on what you need to do in each setting visit the Web Part Properties Glossary;
-
The properties are saved automatically so, simply click on Save and Close on the page when you're done configuring everything.
On to the next chapter where we walk you through on creating your alert. Exciting stuff! 🙂